
Braille tactile markings integrate into Keypado’s metal keypad layouts through raised dot engraving positioned directly on or beside each key, following standard cell spacing for finger recognition. This custom engraving process pairs with rugged, IP-rated construction, supporting accessible ATM, kiosk, and access-control designs. Keypado is trusted by 200+ clients worldwide.
What do you need before adding braille to a keypad?
Three things come first: a clear layout plan, the right manufacturing partner, and a reason rooted in real-world use. Roughly 15% of the global population lives with a disability, so tactile input isn’t a niche accommodation. It’s a design requirement for any public-facing terminal. Skipping this step risks locking out a substantial slice of end users before a device even ships.
Get a Custom Metal Keypad Quote From Keypado
Start with the metal keypad layout itself. Keypado engineers configure layouts, interface options, and engraving as standard, adjustable features, which means tactile dots and raised markers can be planned into the tooling from day one rather than bolted on later. Working with a factory that designs and builds from a single facility. Keypado’s operations run out of Yuyao, Zhejiang, China. Also gives OEM engineers a direct channel back to production, so layout tweaks don’t get lost in translation between vendors.
Why does braille still matter on digital devices?
Digital assistive tools have chipped away at everyday braille use, but on physical hardware it still carries weight. Braille and tactile markings stay essential for safety. Navigation, particularly in loud kiosks or outdoor terminals where audio prompts fail. A vending machine on a windy street corner can’t rely on sound alone.
What specs should engineers confirm before production?
Confirm engraving depth, key spacing, and dot placement against the layout drawings before tooling starts. Review CAD files with the manufacturer early to catch conflicts between tactile elements and button function.
How do you map braille onto a metal keypad layout?
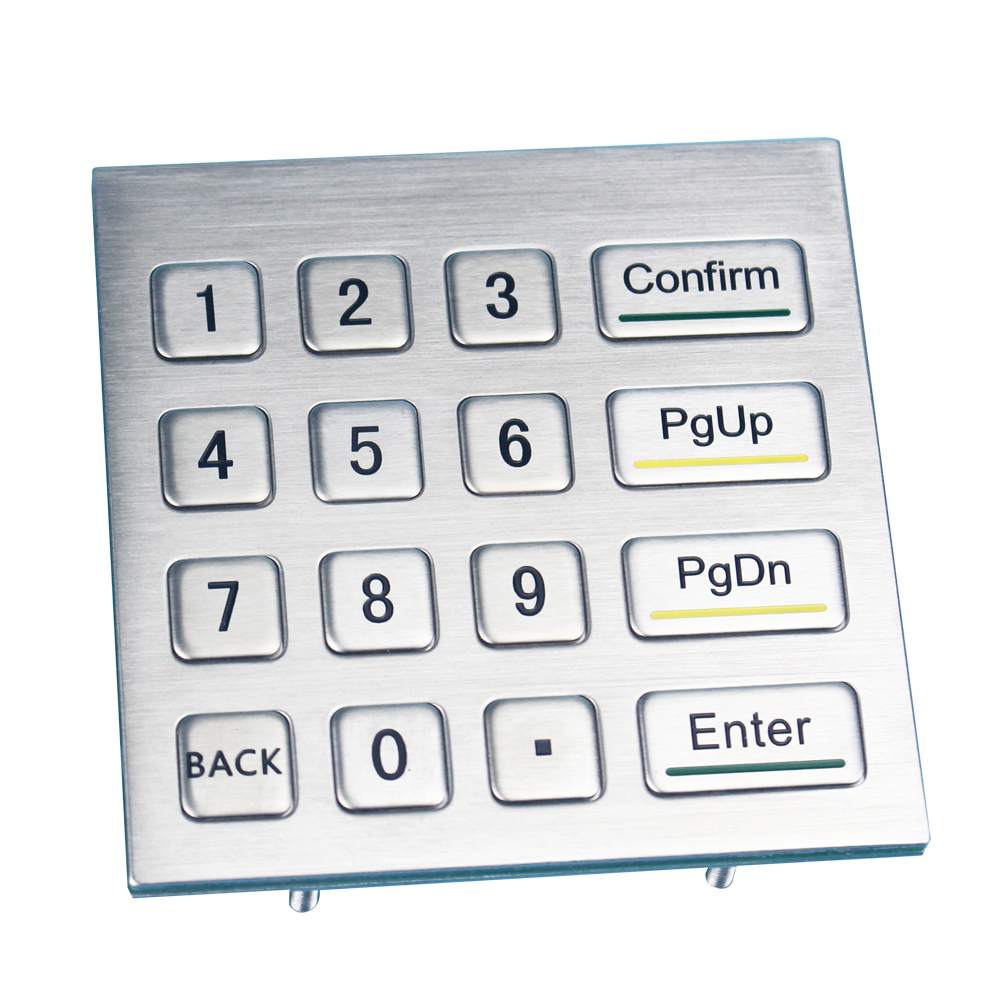
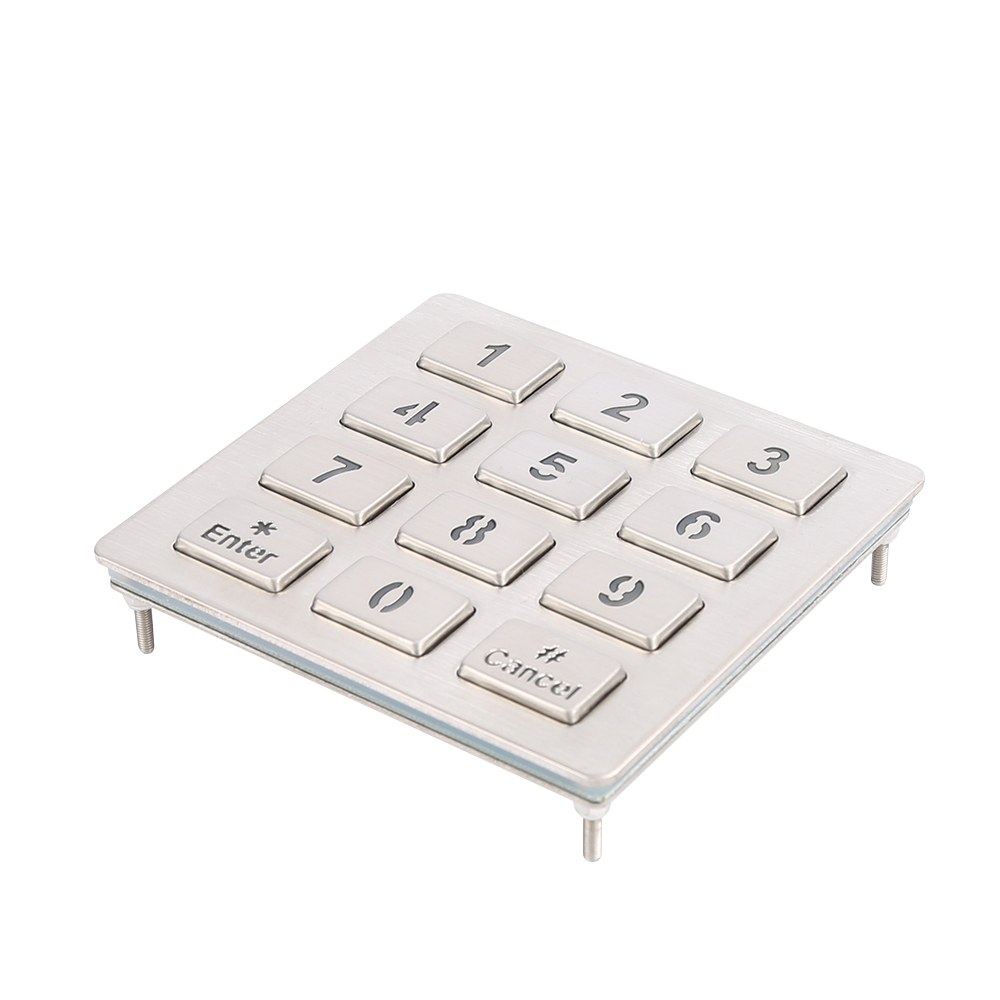
Mapping starts with the grid, not the dots. Design engineers begin with a metal keypad layout in a 3×4 or 4×4 configuration. Keypado builds these to drop straight into an existing panel cutout. That fixed footprint gives a project team firm boundaries for planning where each raised dot or engraved marking will sit relative to its key.
Follow these steps to place tactile references correctly:
Lock the panel dimensions first. Confirm the 3×4 or 4×4 cutout before touching braille placement, since the grid dictates spacing.
Assign a tactile anchor per key. Most numeric layouts use a raised marker on the number 5, letting a finger locate the rest of the grid by touch.
Check electronics compatibility. USB or matrix output makes controller integration straightforward, so tactile additions won’t force a redesign of the wiring behind the panel.
Specify wear-resistant marking depth. Vandal-proof metal keys endure millions of presses, and any embossed or engraved braille dot has to survive that same mechanical load without flattening out.
Cross-check against signage standards. Public accessibility guidelines treat visual and tactile content as two connected requirements on any sign, a framework worth borrowing when deciding where markings belong on the keypad face itself.
Where should braille sit on a numeric keypad?
Braille reference points typically sit directly on or beside the key they identify, not on a separate strip. Placing markings this close keeps a user’s finger movement minimal and reduces input errors on repeated use.
Does adding braille change the panel cutout size?
No — because the 3×4 and 4×4 layouts already fit standard OEM cutouts, adding braille and tactile markings doesn’t require enlarging the panel opening. The markings live on the existing key surface, so mechanical integration stays unchanged. That keeps retrofit projects simpler for teams updating older terminals.
How do you select and place tactile markings for durability?
Durability starts with material choice, not dot placement. Rugged metal keypad layout design gives raised markings a fighting chance against years of outdoor abuse, repeated strikes, and constant handling. Kiosk manufacturers and terminal designers who skip this step often watch tactile dots wear smooth within months, leaving visually impaired users guessing at button locations.

Get a Custom Metal Keypad Quote From Keypado
Metal construction offers vandal-proof, IP-rated protection that keeps braille and tactile markings legible even after heavy field use. Plastic overlays crack or peel; stamped or engraved metal holds its shape through thousands of impacts. That resilience matters most on public-facing devices like ATMs and access panels, where abuse is routine rather than rare.
Sealing plays an equally important role. IP65+ protection against dust and water ingress stops grime from building up around raised dots, which otherwise dulls their profile over time. A tactile marking buried under years of dust does no one any good.
Where should tactile markings go on a keypad?
Placement follows a simple rule: consistency builds trust. Positioning tactile surfaces in specific, predictable spots — like a raised dot on the “5” key. Helps users navigate by touch alone, supporting both safety and wayfinding. Randomized or inconsistent placement across product lines forces users to relearn the layout every time, which defeats the purpose entirely.
How can engineers test tactile designs before full production?
Prototyping catches problems early. Fast sampling, low MOQs, and on-time delivery let engineering teams physically test dot height, spacing, and texture before locking in tooling. That quick feedback loop:
Confirms braille dot height meets usability needs
Verifies spacing works for real fingertip navigation
Prevents costly redesigns after full production begins
How do you test and validate the finished layout?
Validation happens on the physical part, not on a drawing. A finished metal keypad layout needs hands-on testing before it ever reaches a production line. Dot height and spacing behave differently on dimensional metal than they do on a apartment printed proof. Adding braille and tactile markings to a real three-dimensional surface costs more. Takes more engineering care than printing braille on paper. Each raised character needs physical space milled or formed into the part.
Follow these steps to validate a tactile layout before committing to volume production:
Confirm prerequisites: finalize the button count, spacing, and mounting interface before adding tactile markings.
Produce a working sample unit that matches the intended production material and finish.
Check dot height and spacing against accessibility reference standards, using fingertip testing where possible.
Cycle-test the keys under repeated presses to confirm the raised markings hold up under heavy field use.
Review the sample with the OEM engineering team and flag any adjustments before mass production begins.
Why does deployment history matter for validation?
A design history reduces guesswork. Keypado’s layouts have already run in deployments topping 100,000 units, giving OEM teams a proven reference point rather than a blank slate. That track record, paired with a client base of more than 200 companies worldwide, including access control and self-service kiosk projects, means accessibility-sensitive layouts have already been through real-world wear.
How does OEM/ODM support speed up validation?
Working with OEM/ODM engineering support shortens the back-and-forth. Development time drops and field reliability improves, which trims the number of sample rounds needed before a tactile layout gets locked in.
What mistakes should you watch for and fix?
Three mistakes account for most accessibility failures on industrial keypads: skipping tactile cues to cut cost, spacing dots inconsistently, and treating braille as an afterthought instead of a core design input. Each one carries real consequences for OEMs building access control panels, lockers, vending units, and fuel dispensers. A locked-out or frustrated user turns into a support call or a lost sale.
Braille and tactile markings often get dropped from early prototypes to save time and money. Digital assistive tech has reduced everyday braille reliance, but tactile cues remain essential for safety and navigation, especially in loud kiosks or outdoor terminals where audio prompts fail. Cutting them at the design stage is a shortcut that backfires in the field.
Get a Custom Metal Keypad Quote From Keypado
Why does dot placement matter so much on a metal keypad?
Inconsistent dot spacing or unclear key differentiation turns a functional metal keypad layout into a usability failure, not a minor compliance gap. Visually impaired users already face real friction adopting new devices. A poorly mapped keypad multiplies that friction instead of removing it. Precision in raised-dot alignment and key-edge contrast makes the difference between a device people trust and one they avoid.
How can engineering teams catch these errors before production?
Sampling before committing to a full run solves most of these problems. Low-MOQ prototypes with fast turnaround let teams test tactile placement on real hardware, not just CAD files. Recommended review steps:
Order a small sample batch early in development.
Test dot height and spacing against ADA-style tactile standards.
Verify key differentiation by touch alone, without visual cues.
Confirm findings with engineering before locking the production tooling.
Integrating braille tactile markings into your metal keypad layout transforms accessibility from an afterthought into a core design feature. When you combine durable metal construction with thoughtful tactile elements, you’re creating input devices that work for everyone—regardless of vision capability. That’s the kind of inclusive engineering that sets rugged industrial equipment apart. It’s exactly what Keypado brings to the table when you’re ready to build keypads that truly serve all your users.
FAQ
Where do braille markings go relative to the keys?
Braille reference points sit directly on or beside the key they identify, following standard cell spacing for finger recognition rather than on a separate strip.
Which key gets the tactile anchor on a numeric layout?
Most numeric layouts place a raised marker on the number 5, letting a finger locate the rest of the 3×4 or 4×4 grid by touch alone.
What keypad specs need confirmation before production starts?
Engineers confirm engraving depth, key spacing, and dot placement against layout drawings, then review CAD files with the manufacturer early to catch conflicts between tactile elements and button function.
 English
  Deutsch
  Français
  Polski
  Português do Brasil
  Español
  日本語
日本語  Русский
  العربية
  Italiano
  Nederlands
  Türkçe
  한국어
한국어